Licensed Cape Cod Contractor · Free Project Assessment
Call Now
WM Construction
Get Free Quote
Centerville, MA

Shower Tile Installation on Cape Cod, MA

Last reviewed May 2026 by WM Construction, Licensed MA General Contractor

WM Construction installs shower tile across Cape Cod, ceramic, porcelain, natural stone, and large-format formats on walls and pans, set over Schluter Kerdi-Shower or RedGard waterproofing membranes. Most shower tile installations run 4 to 7 days on site once substrate is prepared and waterproofing is set, following a strict sequence: demo, substrate inspection, cement backer or uncoupling membrane, waterproofing, thinset, tile, grout, and silicone at every change-of-plane joint. Licensed Massachusetts General Contractor since 2016, HIC registered, EPA RRP Lead Safe certified, and an approved Hanscom Air Force Base vendor since 2015. Office and showroom: 1550 Falmouth Road, Suite 26, Centerville, MA 02632. Call (774) 224-8561.

Shower Tile Installation on Cape Cod, MA, WM Construction Centerville
5.0Google Rating
39Verified Reviews
9+Years in Business
MA Licensed GC + HIC + EPA RRP
Free In-Home Estimate

Shower Tile Installation for Cape Cod Homeowners

Most Cape Cod shower tile installations come from one of three triggers. A homeowner refreshing an existing shower where the tile is dated or visually worn but the substrate and waterproofing are still sound, allowing tile-only scope without full demolition. A new walk-in shower installation where tile is the planned wall and pan finish and tile work is one phase of a broader project. A failure-driven replacement where existing tile has cracked, detached, or shown grout failure that indicates substrate or waterproofing compromise, requiring more invasive scope than tile-only refresh.

The honest first question on every shower tile project is whether the substrate and waterproofing membrane underneath are intact. Tile-only scope works when both are sound. When grout failure, cracked tile, or visible water damage indicates substrate or membrane compromise, the project needs to extend past tile to address the underlying systems, otherwise new tile fails on the same timeline as the old one. WM Construction is a Cape Cod-based licensed Massachusetts general contractor, not a national franchise booking jobs through a 1-800 line, operating from Centerville since 2016 and an approved Hanscom Air Force Base vendor since 2015. We diagnose substrate condition during the site visit and recommend scope based on what the bathroom actually needs.

Scope TriggerWhat's SoundTypical WorkTimeline On Site
Cosmetic refreshSubstrate + membrane intactTile-only swap, new grout, new silicone4–6 days
New walk-in showerN/A, bare framingBacker + Kerdi + pan + full tile5–7 days (tile phase)
Grout / sealant failureSubstrate intact, joints failedRe-grout + silicone re-sealing2–4 days
Substrate compromiseNothing, gut requiredDemo to studs, rebuild waterproofing, full tile7–10 days

Types of Shower Tile for Cape Cod Homes

Ceramic Tile by WM Construction, Centerville, MA

Ceramic Tile

Ceramic tile is the budget-friendly option for shower walls and pans, made from glazed clay fired at lower temperatures than porcelain. Wide availability, lower cost than porcelain or stone, but more porous and less durable on shower pans. Best for shower walls in budget-conscious projects and rental property scope where moderate durability is acceptable.

Porcelain Tile by WM Construction, Centerville, MA

Porcelain Tile

Porcelain tile is denser and less porous than ceramic, fired at higher temperatures with finer clays. Better water resistance, more durable on shower pans, available in tile that mimics natural stone, wood, or concrete at a fraction of natural-material cost. Best for most Cape Cod shower applications as the price-to-durability sweet spot.

Natural Stone Tile by WM Construction, Centerville, MA

Natural Stone Tile

Natural stone (marble, travertine, slate, granite) delivers a premium aesthetic with unique veining and natural variation. Requires sealing every 1 to 3 years to maintain stain resistance, more expensive than ceramic or porcelain. Best for premium master bath and primary suite installations where natural material is the design priority.

Large-Format Tile by WM Construction, Centerville, MA

Large-Format Tile

Large-format tile (12x24 inches and larger) reduces grout lines and creates modern visual scale. Requires very flat substrate (within 1/8 inch over 10 feet) to avoid lippage where tile edges sit unevenly.

What to Expect from Shower Tile Installation Done Right

Substrate Inspection Before Any Tile Goes Up

A real shower tile project starts with substrate inspection. Existing substrate (typically cement backer board or older lath-and-plaster) gets checked for soundness, water damage, and structural integrity per TCNA Handbook standards. Cracked or compromised substrate must be replaced before tile goes up. Tile installed on failing substrate fails on the same timeline as the substrate, regardless of tile quality.

Waterproofing Membrane System Required

Waterproofing membrane (Schluter Kerdi, RedGard, Mapei Mapelastic) installed on every wall surface and pan that will see water. Walls extend membrane at minimum 6 inches above showerhead height. Membrane integrates at every transition between wall and pan, around fixtures, and at curb where applicable. Tile is decorative; membrane is what keeps water out of the wall.

Proper Thinset Application With Trowel-Notch Sized to Tile

Thinset (the mortar that bonds tile to substrate) must be applied with the correct trowel-notch size for the tile. Smaller tile uses 1/4 inch notch trowels, larger tile uses 1/2 inch or larger. Improper coverage produces hollow spots where the tile is not bonded to substrate, leading to cracked tile and detachment.

Grout and Sealant Selected for Shower Use

Grout for shower applications uses sanded grout for joints over 1/8 inch and unsanded for tighter joints. Epoxy grout is more water-resistant than cement-based but more difficult to install. Sealant at every change-of-plane joint (corner, wall-to-pan, around fixtures) uses 100 percent silicone, not grout. Grout cracking at change-of-plane joints is the leading cause of grout failure on improperly installed showers.

One Year Workmanship Warranty in Writing

Every WM Construction shower tile installation scope closes with a written one year workmanship warranty on the install work. Manufacturer warranties on tile, waterproofing systems, and grout remain separate.

How We Handle Shower Tile Installation on Cape Cod

  1. 1

    Step 1, Site Visit, Substrate Assessment, and Tile Discussion

    Onsite walkthrough at your Cape Cod home to inspect existing tile and substrate condition, identify failure modes (substrate damage, waterproofing failure, grout breakdown), and discuss tile material (ceramic, porcelain, natural stone, large-format) against budget and aesthetic priorities. Pre-1978 lead paint flag raised where applicable. Typically one hour on site.

  2. 2

    Step 2, Selection, Specification, and Written Estimate

    You select tile material, pattern, grout color, and any decorative elements. Selections finalized in writing before contract signing. Estimate breaks out demolition (if applicable), substrate repair contingency, waterproofing membrane, tile material, thinset, grout, sealant, and labor as distinct line items.

  3. 3

    Step 3, Contract, Permits Where Required, and Material Sourcing

    Contract signed with milestone schedule. Building permit pulled with the Cape Cod town when scope requires under 780 CMR. Insurance certificates delivered before mobilization. Tile material sourced and delivered to align with installation start. Custom or imported tile lead times noted.

  4. 4

    Step 4, Demolition, Substrate Prep, and Waterproofing

    Existing tile and damaged substrate removed where applicable. Substrate inspected and replaced where failed. EPA RRP containment applied on pre-1978 surfaces. Cement backer board or uncoupling membrane installed. Waterproofing membrane installed on walls and pan with proper integration at transitions and around fixtures.

  5. 5

    Step 5, Thinset, Tile Setting, Grout, and Walkthrough

    Thinset applied with trowel-notch sized to tile. Tile set with proper coverage and spacing. Grout applied after thinset cures. Sealant applied at all change-of-plane joints. Final walkthrough with the homeowner. One year workmanship warranty issued in writing.

Shower Tile Installation on Cape Cod, MA, WM Construction project in Centerville, MA

What Affects the Cost of Shower Tile Installation on Cape Cod

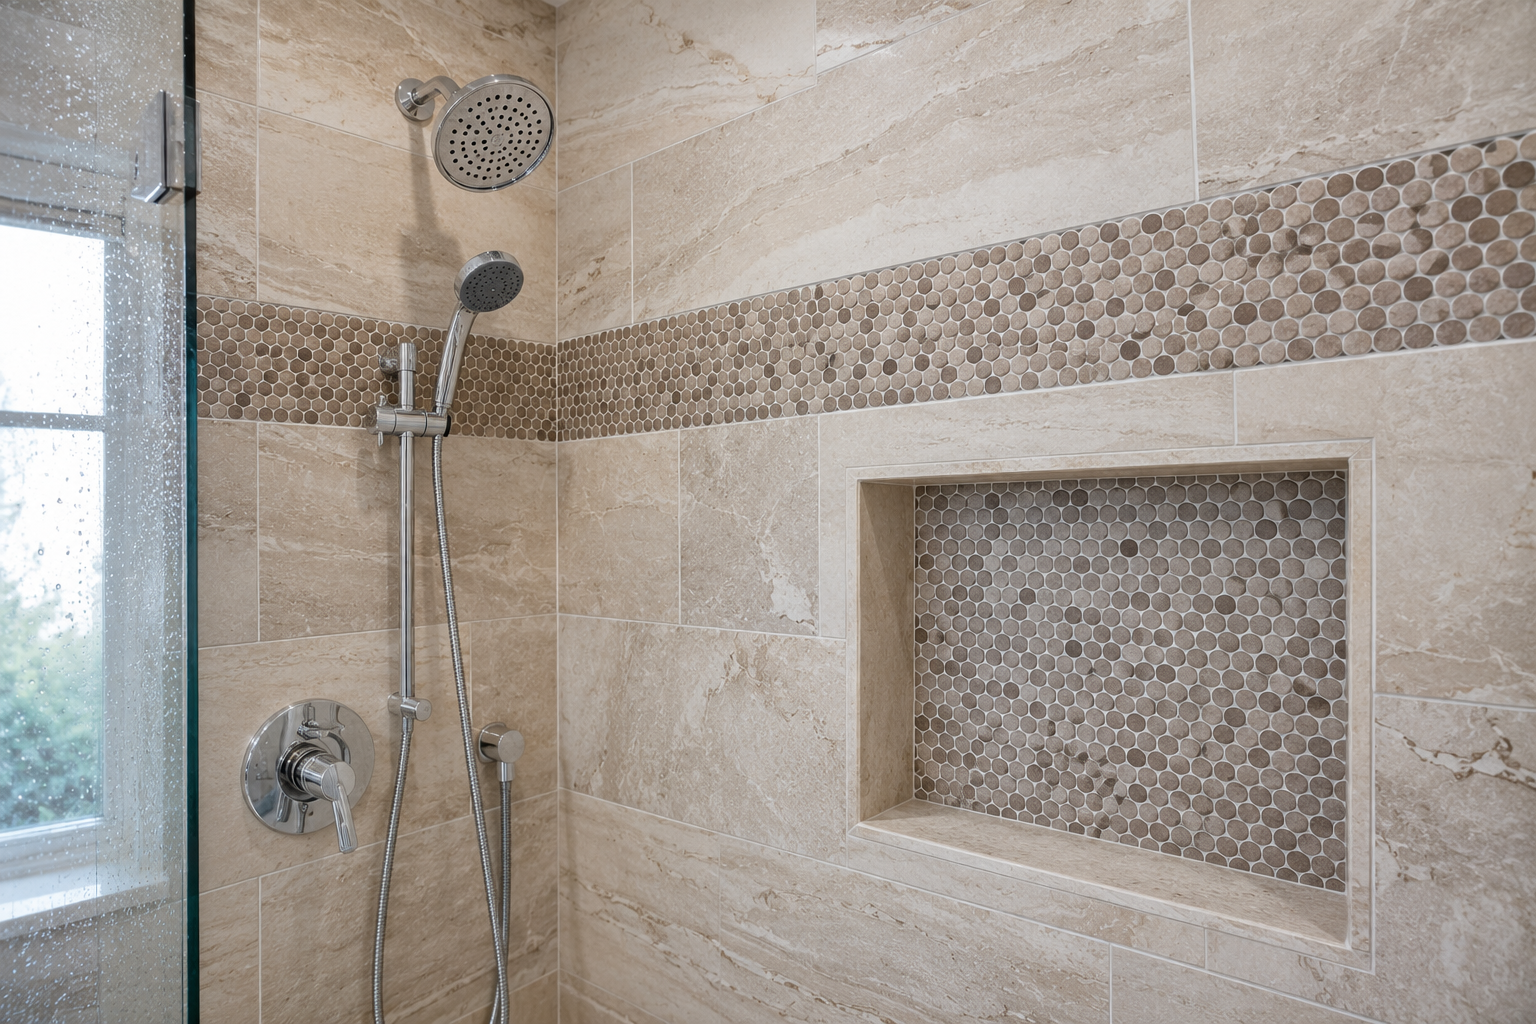
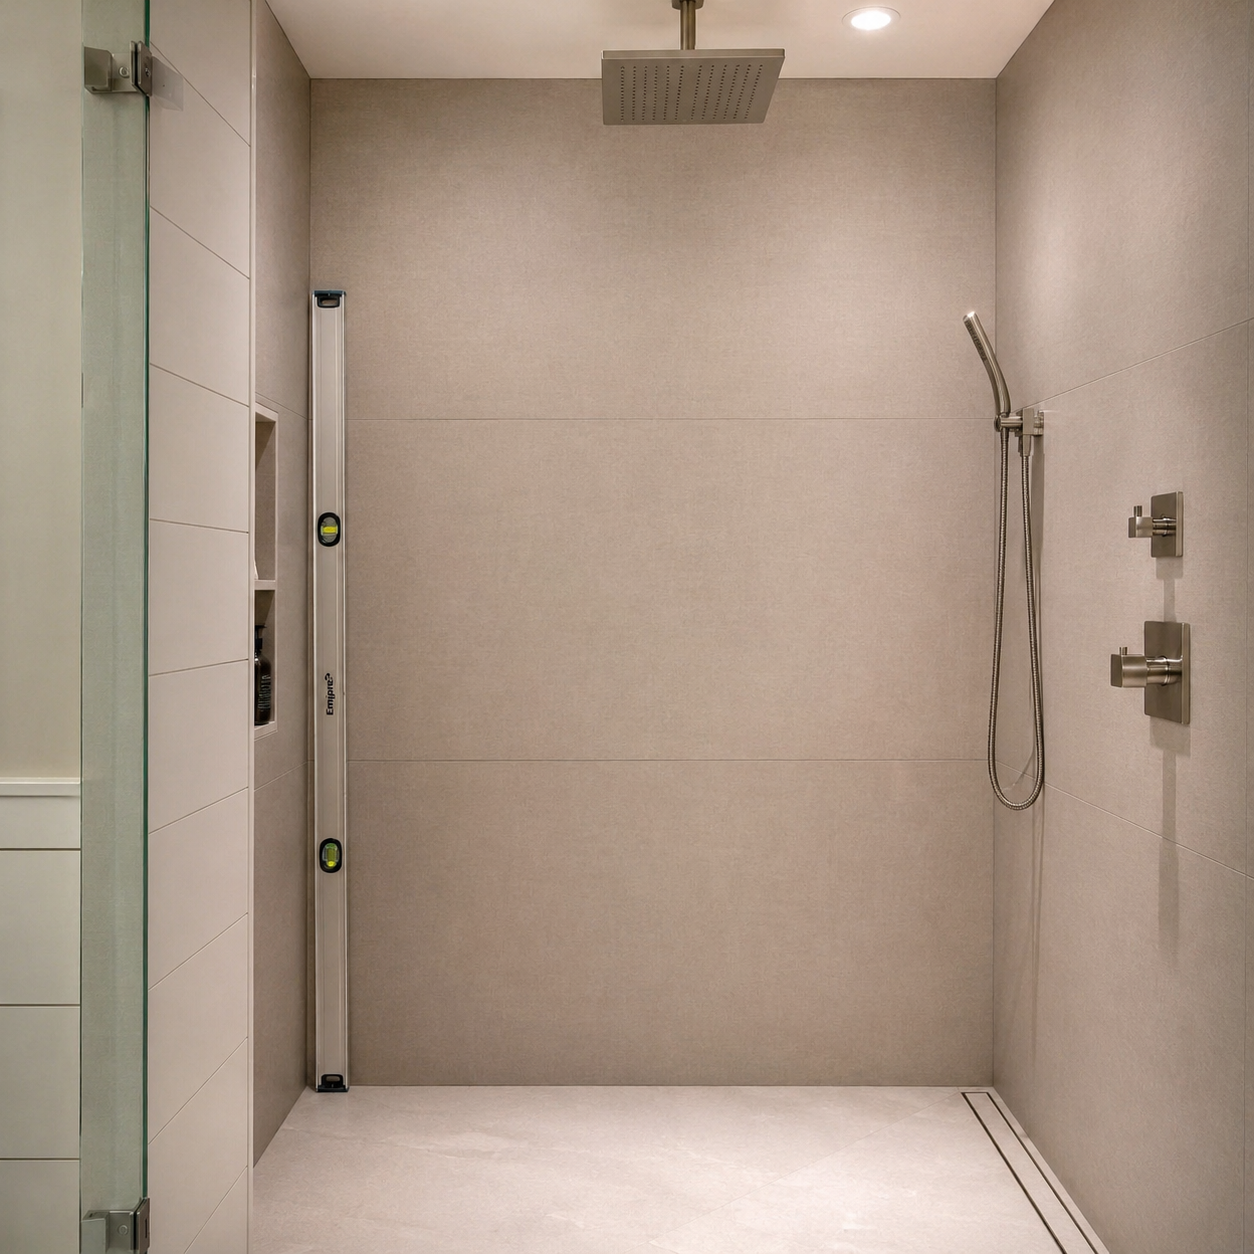
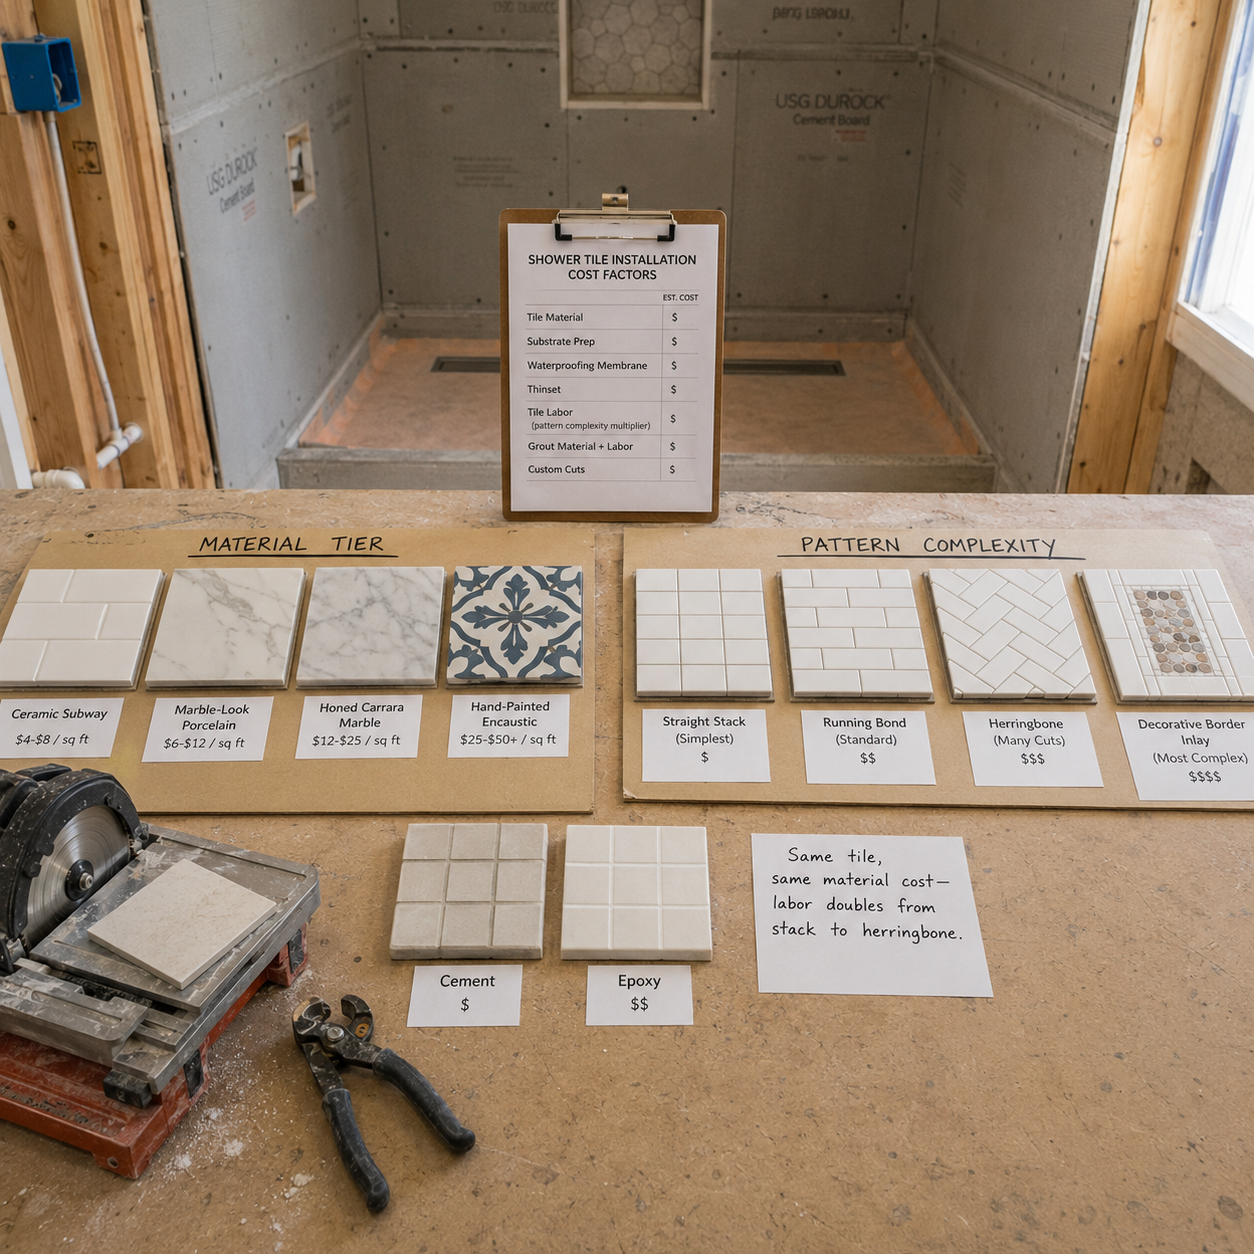
Cape Cod shower tile installation cost is shaped by tile material, scope, substrate condition, and pattern complexity. Tile material is the largest variable: ceramic runs lowest, porcelain runs higher, natural stone runs highest. Imported tile or custom-cut natural stone runs higher still. Scope matters: tile-only refresh on sound substrate runs lower than scope requiring substrate repair or waterproofing replacement. Pattern complexity (running bond, herringbone, basket-weave, decorative inlay) adds labor cost over straight-set patterns. Large-format tile requires flatter substrate and adds substrate prep cost. Grout selection (cement-based vs epoxy) drives modest cost variation. Custom tile cuts (curved walls, accent inlays, mosaic borders) add labor hours.

Tile material and labor scale roughly together, but custom or stone material can shift the labor-to-material ratio substantially. We provide line item estimates that break out material, substrate prep, waterproofing, thinset, grout, and labor as distinct cost categories. Call (774) 224-8561 or visit our office at 1550 Falmouth Road, Suite 26, Centerville, MA 02632 to schedule a site visit.

Customer Reviews

What Cape Cod Homeowners Say About WM Construction

5.0
★★★★★

39 Google Reviews

See All Reviews on Google →
★★★★★

Marcelo's tile crew did our master shower with 12x24 porcelain over Schluter Kerdi. They flood-tested the pan before tile, and you can tell, three years in and not a single grout crack at the corners. They use silicone at change-of-plane joints, which apparently most contractors skip.

Verified Google Reviewer Google
★★★★★

Had WM redo the shower tile in a Falmouth bathroom after the previous installer's grout failed in 18 months. They tore out to substrate, found rot we didn't know about, rebuilt waterproofing, and re-tiled. Honest about what they found and the price was fair.

Verified Google Reviewer Google

Shower Tile Installation Across Cape Cod and the South Shore

WM Construction installs shower tile across Cape Cod and Barnstable County, Upper Cape (Bourne, Sandwich, Falmouth, Mashpee), Mid-Cape (Barnstable, Centerville, Yarmouth, Dennis), and the Outer Cape (Brewster, Harwich, Chatham, Orleans, Eastham). We also serve Plymouth and South Shore communities just over the Sagamore Bridge and Bourne Bridge. Year-round homeowners refreshing existing shower tile, recent buyers replacing dated or failed tile, and new shower installations all schedule tile work through the same licensed crew.

Office and showroom: 1550 Falmouth Road, Suite 26, Centerville, MA 02632. Call (774) 224-8561 to schedule an on-site shower tile assessment. Approved Hanscom Air Force Base vendor since 2015.

Common Questions About Shower Tile Installation on Cape Cod

Tile-only refresh on a sound shower (no plumbing or framing changes) typically does not require a permit. Once the scope touches plumbing valves, drain location, framing, or full waterproofing rebuild, a building permit under 780 CMR and a plumbing permit under 248 CMR are required. WM Construction pulls every required permit and schedules the inspections, never shortcut around the building department.

Shower tile installation typically runs 4 to 7 days on site once substrate is prepared and waterproofing is installed. Demolition of existing tile adds 1 to 2 days. Substrate repair adds 1 to 3 days where required. Custom or imported tile lead times can extend total project time by 1 to 4 weeks. Grout cure time before water exposure runs 24 to 72 hours after installation.

Generally not recommended. Installing tile over tile traps moisture against the original substrate, hides waterproofing condition the homeowner cannot inspect, adds wall thickness that affects fixtures and trim integration, and limits manufacturer warranty coverage. Standard practice on every WM Construction shower tile installation is full demolition to substrate.

Ceramic runs lowest cost but is more porous. Porcelain is denser and more durable than ceramic and is the price-to-durability sweet spot for most Cape Cod showers. Natural stone delivers premium aesthetic with unique veining but requires sealing every 1 to 3 years.

Grout failure has three primary causes: improper thinset coverage producing hollow spots that flex and crack grout, improper sealant at change-of-plane joints (corner, wall-to-pan) where rigid grout fails under movement, and substrate or waterproofing failure that compromises the entire wall behind the tile. Real installation uses 100 percent silicone at all change-of-plane joints, not grout.

Get Started

Start Your Shower Tile Installation Project on Cape Cod

<p>Installing shower tile on a Cape Cod home is a substrate and waterproofing decision before it is a tile-aesthetic decision, and the difference between tile that lasts decades and tile that fails in a few years is whether the contractor inspected the substrate and installed the waterproofing membrane correctly. Call <strong>(774) 224-8561</strong> or request a site visit, and Jackeline or Marcelo will walk through your existing shower, inspect substrate condition, and discuss tile and pattern options.</p> <p>Office: 1550 Falmouth Road, Suite 26, Centerville, MA 02632. Approved Hanscom Air Force Base vendor since 2015.</p>